Last updated 4 October 2026
When ServiceNow is connected, you can link a Leysa request to a ticket. When the request finishes, Leysa adds a work note to that ticket saying what happened.
You connect ServiceNow in two steps. First you set up a user and an OAuth client for Leysa in ServiceNow. Then you enter the client's details in Leysa.
Before you start
- Time needed: About 10 minutes
- Your role in Leysa: Owner or Admin
- Your role in ServiceNow: admin
- What you will copy from ServiceNow: Your ServiceNow address, a Client ID and a Client Secret
Two things to know:
- Leysa's work notes appear under the name of the user you make for Leysa. You choose that name in Step 2.
- Only one service desk can be connected at a time. If Jira Service Management, Halo or Freshservice is connected, disconnect it first.
These steps match current ServiceNow releases. On older releases some screens have different names, and each step says what to look for.
Step 1: Turn on client credentials
Leysa signs in to ServiceNow with a Client ID and Client Secret. ServiceNow allows this only when one system property is on.
- In ServiceNow, type sys_properties.list in the navigation filter and press Enter.
- Search for glide.oauth.inbound.client.credential.grant_type.enabled.
- If it is listed, open it and set Value to true.
- If it is not listed, click New and enter:
- Name:
glide.oauth.inbound.client.credential.grant_type.enabled - Type: true | false
- Value:
true
- Name:
- Click Submit.
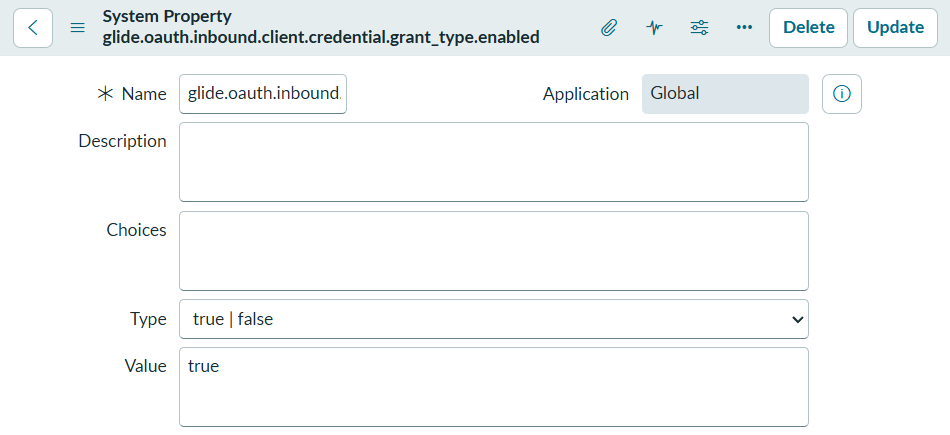
The finished property. Type is true | false and Value is true.
Step 2: Make a user for Leysa
- Open User Administration, then Users, and click New.
- Enter:
- User ID:
leysa - First name:
Leysa - Identity type: Machine
- User ID:
- Tick Internal Integration User. This stops anyone signing in to ServiceNow as this user. On older releases, the box is called Web service access only.
- Click Submit.
- Open the Leysa user again. On the Roles tab, click Edit, add the itil role, and click Save.
Do not skip the role. Without itil, ServiceNow does not let Leysa read tickets or add work notes, and connecting fails.
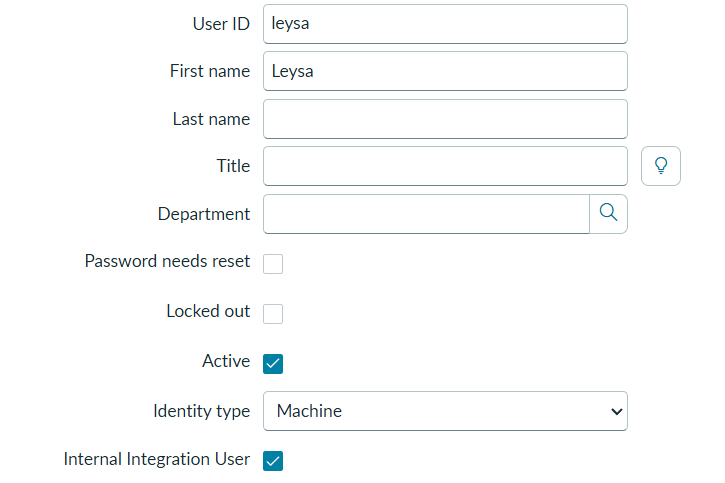
The Leysa user. Identity type is Machine, and Internal Integration User is ticked.
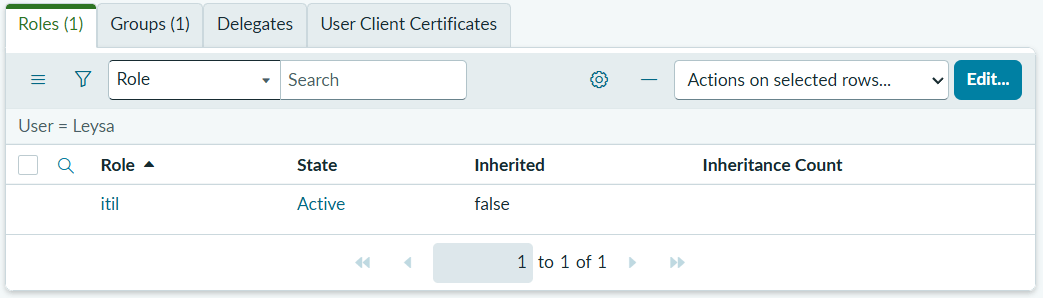
The Roles tab after adding itil. Click Edit to add a role.
Step 3: Make an OAuth client for Leysa
Open Machine Identity Console, then Inbound integrations.
Click New integration and choose OAuth - Client credentials grant.
Enter:
- Name:
Leysa - Provider name:
Leysa - OAuth application user: the Leysa user from Step 2
- Name:
Under Auth scope, click Create auth scope, name it
leysaand click Save.Pick leysa as the Auth scope. Under Limit authorization to the following APIs, choose Table API. Leysa only uses the Table API, so this stops it reaching ServiceNow's other APIs.
Click Save at the top of the page.
Open the Leysa integration in the list. Its name shows a green Securely scoped label when the auth scope is set. Copy its Client ID, then use the copy button beside Client secret.
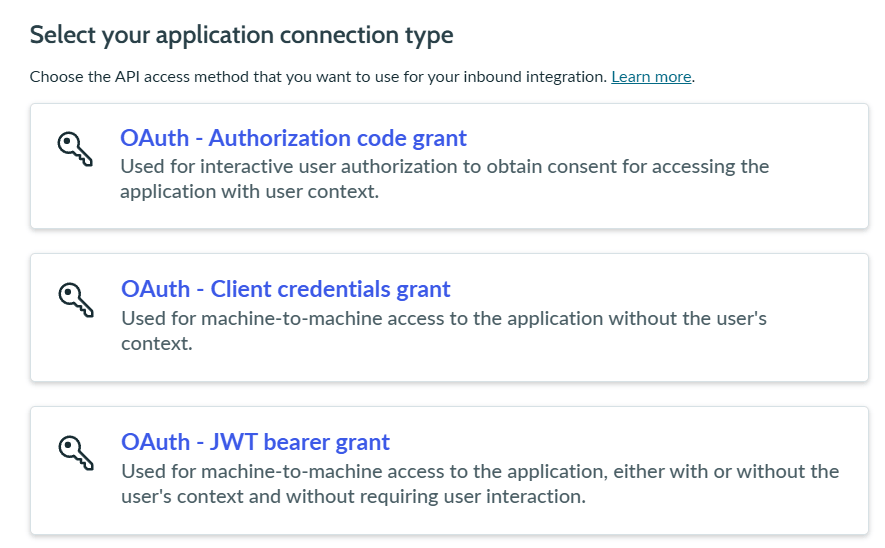
Choose OAuth - Client credentials grant.
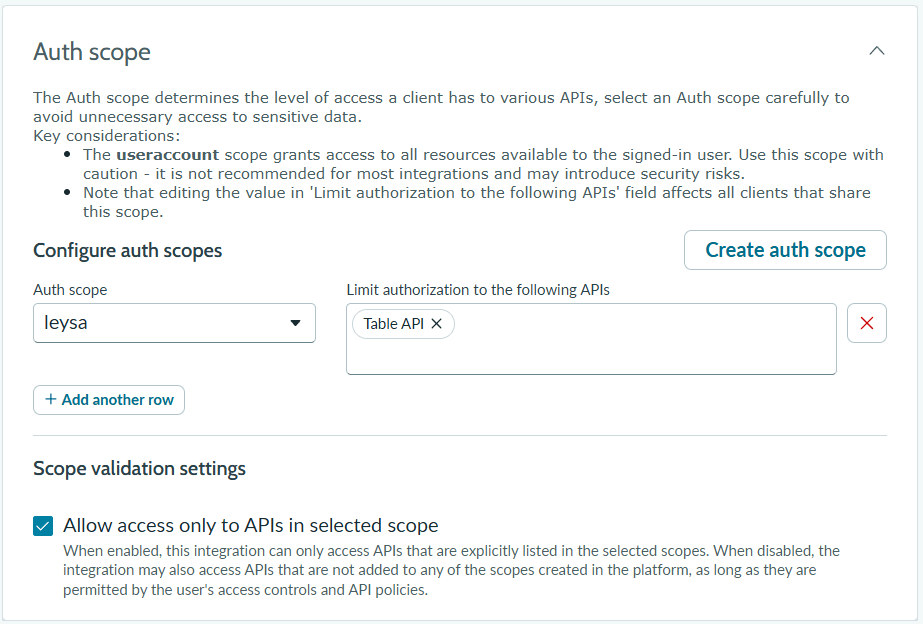
The leysa scope, limited to the Table API. Leave Allow access only to APIs in selected scope ticked.
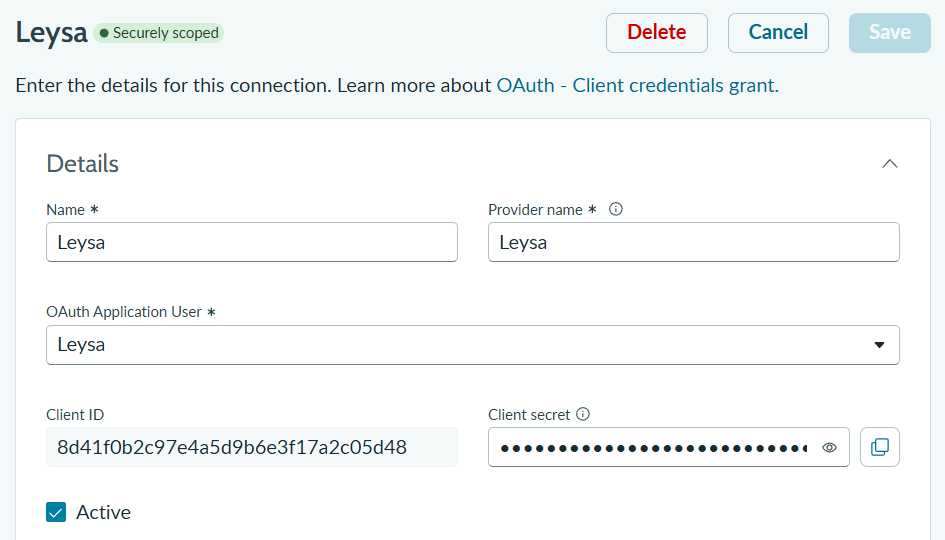
The finished integration, marked Securely scoped. Use the copy button beside the Client secret.
On older releases without Machine Identity Console, open System OAuth, then Application Registry, click New, and choose Create an OAuth API endpoint for external clients. Name it Leysa and set its OAuth Application User to the Leysa user.
Step 4: Enter the details in Leysa
- In Leysa, go to Integrations → ServiceNow.
- Enter your ServiceNow address. This is the address in your browser when you are signed in to ServiceNow, for example
https://yourcompany.service-now.com. - Paste the Client ID and Client Secret.
- Click Connect ServiceNow.
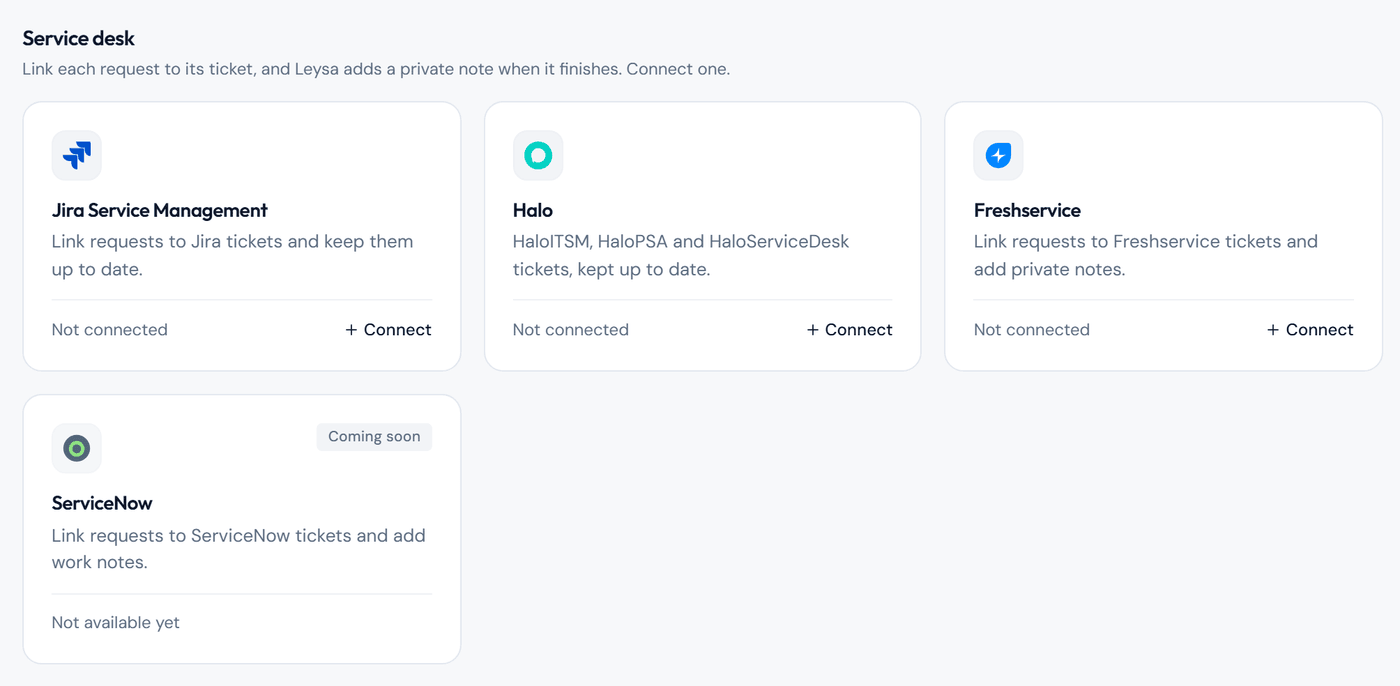
ServiceNow is in the Service desk section of the Integrations page.
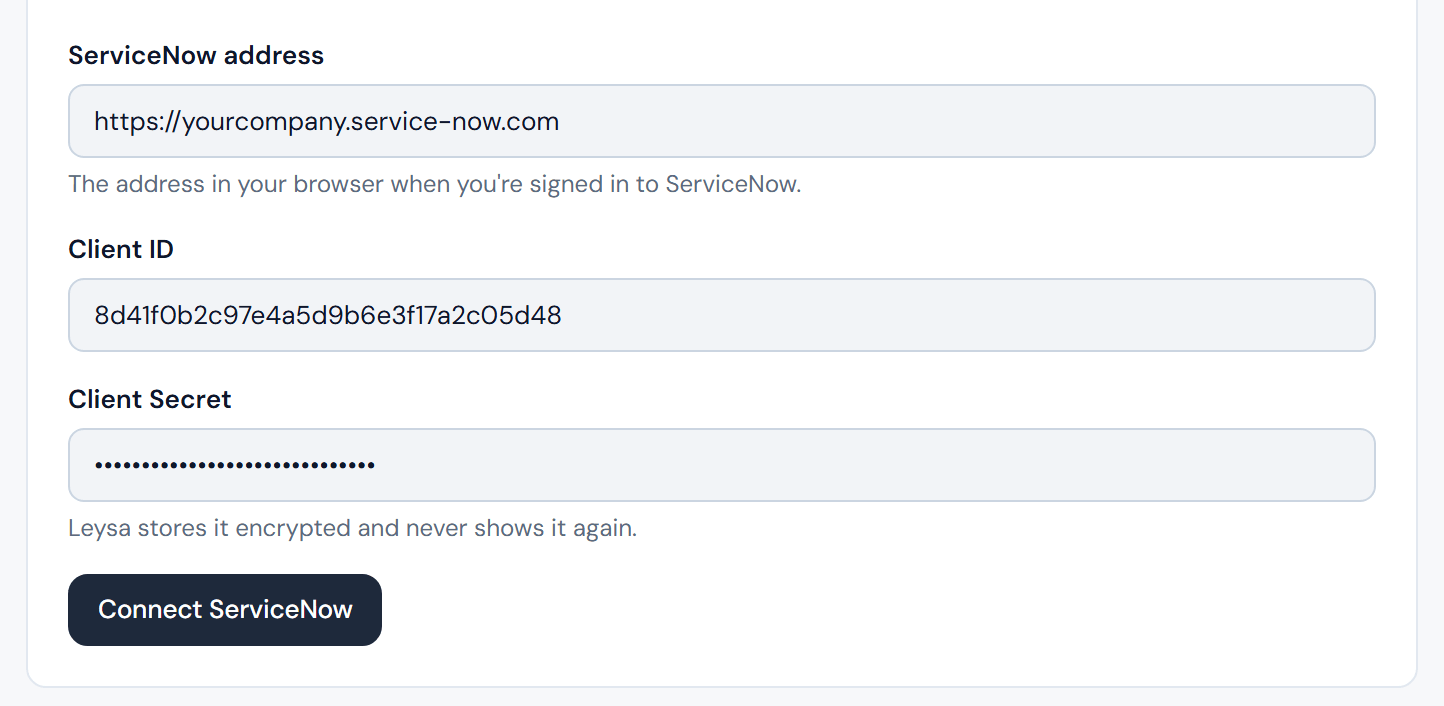
The three details to enter. The Client Secret is hidden as you type.
Leysa checks the details with ServiceNow before it saves them. If ServiceNow accepts them, ServiceNow shows as Connected.
Check it worked
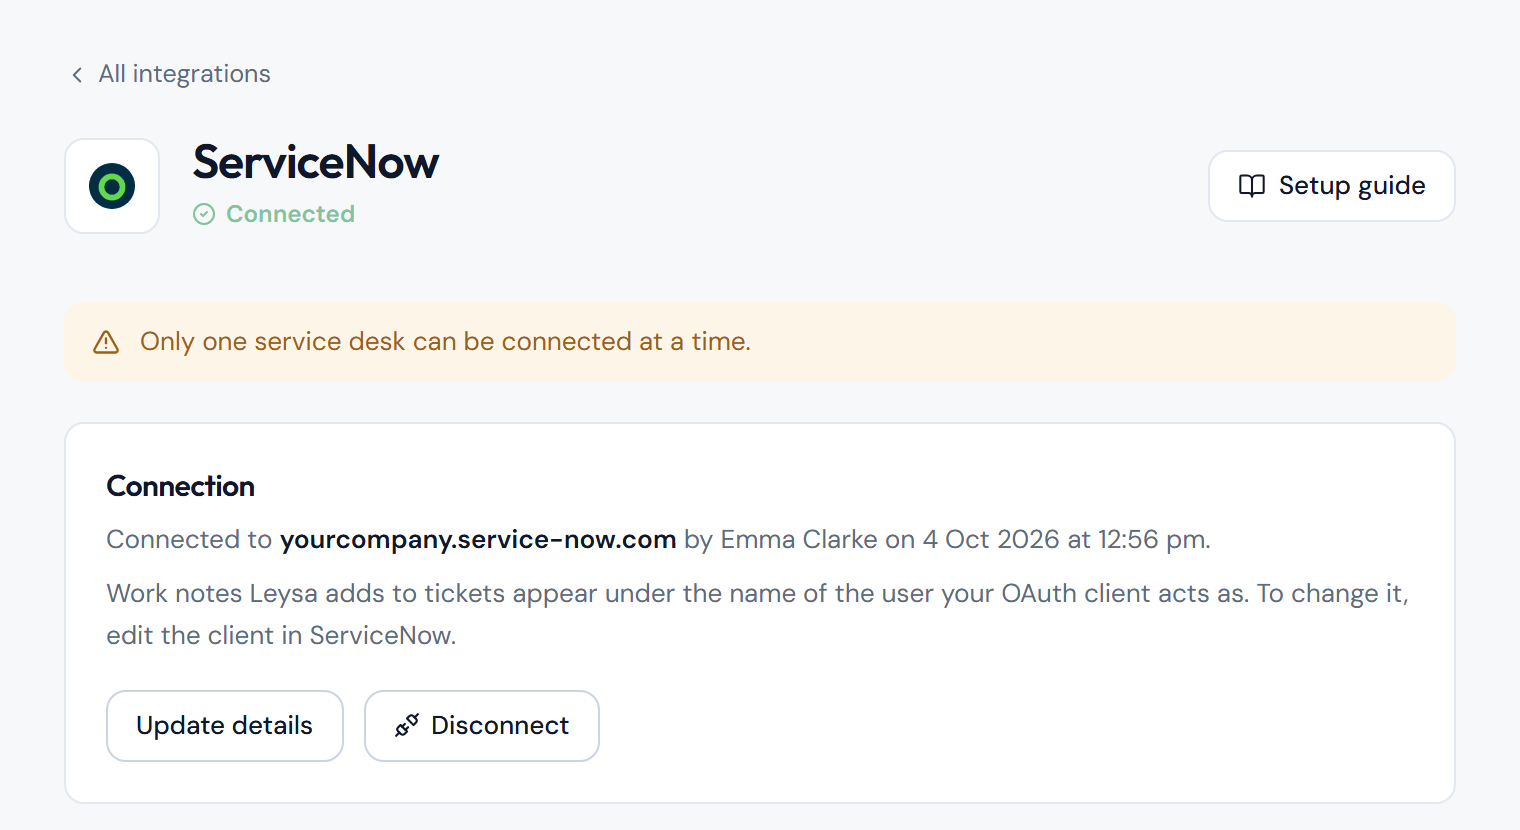
- The ServiceNow page in Leysa shows Connected, with your ServiceNow address, who connected it and when.
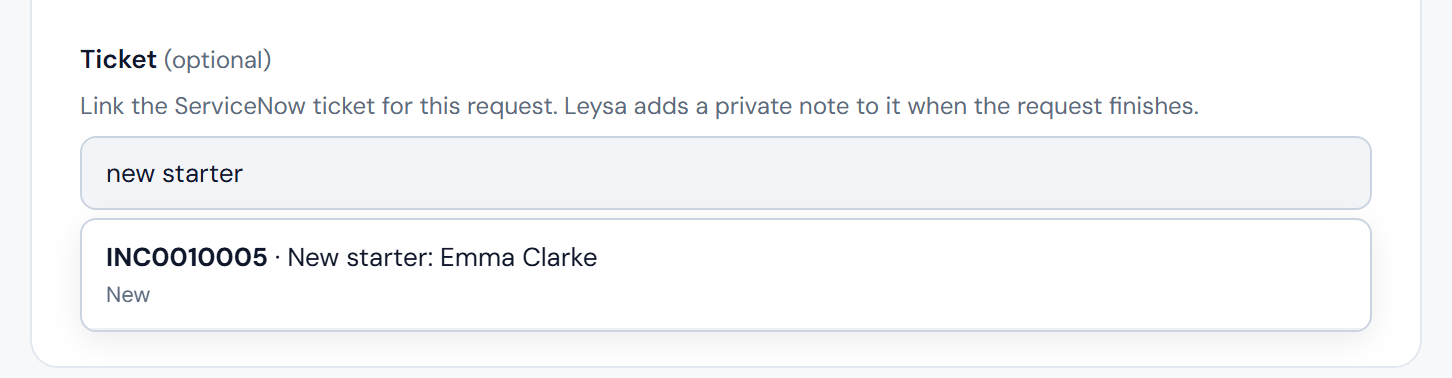
- Open any automation. A Ticket box now appears on the form. Type a ticket number such as
INC0010001, or words from its title, and the ticket appears in the results. You can leave out the zeros:INC10001finds the same ticket.
- Run an automation with a ticket linked. When it finishes, Leysa's work note appears on the ticket in ServiceNow.
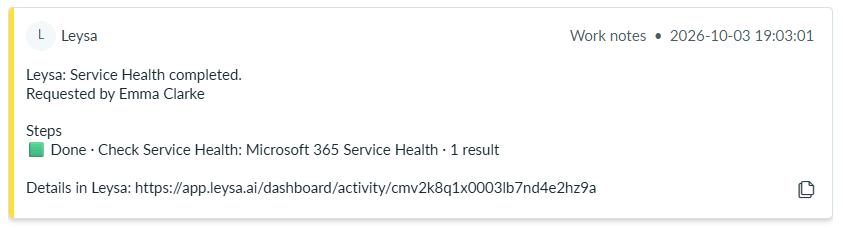
A work note from Leysa. It shows under the Leysa user's name, with the yellow bar ServiceNow uses for work notes.
The Ticket box lists open incidents, requests, requested items and catalogue tasks.
What Leysa can do
Leysa can read tickets and add work notes to them. Nothing else.
- Work notes are internal. The caller never sees them.
- ServiceNow may tell the ticket's assignment group about a new work note, as it does for any agent's work note. That depends on your notification settings.
- The notes never include passwords or password links.
- Leysa keeps only the ticket number, not the ticket's contents.
- The Client Secret is stored encrypted.
If something goes wrong
If ServiceNow does not accept the details, check these in order:
- Is client credentials turned on? If Leysa says ServiceNow hasn't turned on client credentials, do Step 1.
- Does the OAuth client have a user? OAuth application user must be set to the Leysa user. See Step 3.
- Does the user have the itil role? See Step 2.
- Is the address right? It must start with
https://and match the address in your browser when you are signed in to ServiceNow.
Other problems:
- A request in Activity says the ticket was not updated. The OAuth client or the Leysa user was changed or deactivated in ServiceNow. Check them, then click Update details on the ServiceNow page in Leysa.
- The Connect button is missing. Another service desk is connected. Disconnect it first.
Change or remove the connection
- Change whose name the notes show: change the Leysa user's name in ServiceNow, or set a different OAuth application user on the OAuth client.
- Replace the Client Secret: open the Leysa integration in Machine Identity Console, change the Client secret and click Save. Then in Leysa, go to Integrations → ServiceNow, click Update details, and paste the new secret.
- Disconnect: on Integrations → ServiceNow, click Disconnect. Leysa stops linking requests to tickets straight away.
- Remove Leysa from ServiceNow as well: deactivate the OAuth client or the Leysa user.
Related
Still need help? Tell us what you were trying to do and a member of our team will help.